How to install arrow inserts? Can you install them yourself? Yes, you can. The most important thing for utmost inserts is to ensure that the arrow ends are impeccably flat and positioned.
Beyond that, it’s a simple task that can be done quickly and easily without professional involvement. Let’s check out the ways of installing arrow inserts and get the answers related to installing them.
Table of Contents
- Step-by-step Guide On How to Install arrow inserts
- How to install Aluminum arrow inserts?
- How to install inserts in carbon arrows?
- How to install half-out inserts?
- Can you use super glue for arrow inserts?
- FAQs
- In a nutshell
Step-by-step Guide On How to Install arrow inserts
Most of the arrow inserts are installed by the manufacturers. But if you get an arrow with none of them, It’s time to build them on your own. Complete the task according to the following guidelines-
Step-1:
First of all, borrow appropriate inserts from your local archery shop. Keep in mind that the inserts should match the depths of the arrow shafts. It’s better to bring the arrow to the shop to get the correct measurement.
Step-2:
Now make sure that your bow arrows are perfectly seated. If the slide placed into the shafts stops the arrows from slipping, they are seated properly. If the arrow shafts feel loose, then first tighten their screws before starting installation.
Step-3:
Cut the bow arrows, maintaining the proper length. Here you can use an arrow-squaring device to get flat and smooth ends. Normally it’s a tool that erases excessive particles attached to the shafts and knobs. Usual cutters can leave the ends fractured.
Step-4:
Now it’s time to create a perfect alignment for the inserts within the shafts. You’ll need arrow squaring to place the inserts sharp and straight. Otherwise, the insets can be settled in angles, hampering the aiming.
Step-5:
Fixing the ends of the arrow depends on your needs. If you want them to be exactly Ninety degrees, place them straight before adding glue.
Deep Dive: How To Glue Arrow Inserts? [Simple Guide]
But in the case of shrunken ones or HIT inserts, place the inserts 90 degrees against the broadhead. Placing them against the field point will also give equal results.
Step-6:
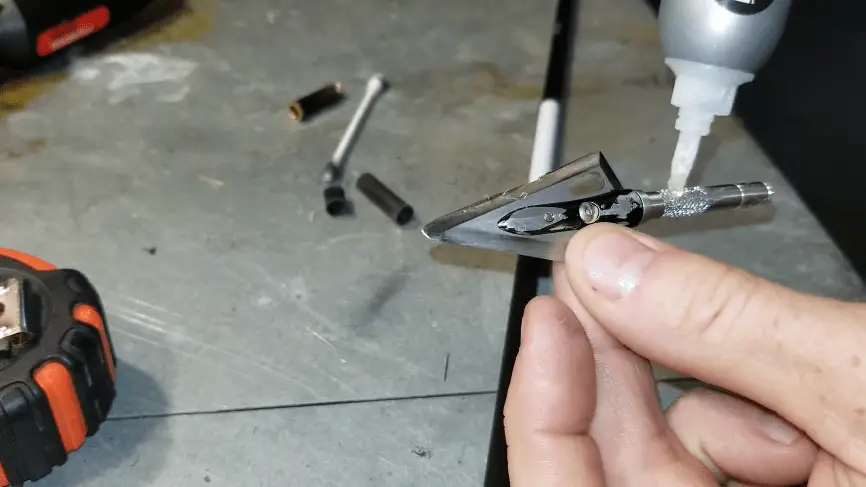
Once the cutting and placing of arrows, shafts, and inserts are done, it’s time for adjusting. Get the best arrow insert glue for pairing them perfectly.
The application of glue in HIT and non-HIT inserts requires a different process.
In the case of non-HIT, insert a fast-setting glue and apply it very gently.
Quickly push the inserts and place them tightly inside the opened shafts. Also, don’t forget to wipe the extra glue attached to the inserts. Normally the parts are attached within a few seconds, but It’s better to wait for 3-4 minutes to pair tightly. And don’t shoot immediately after the installment.
In the case of HIT Inserts, you will need special equipment and a few epoxies. This equipment helps you to place the insert deeper in the shaft.
If you are wondering how to remove arrow inserts immediately, epoxy will help you in this case. So installation and removal both become easy. But you can use it only with HIT inserts.
See how easy it was to install your arrow inserts yourself.
How to install Aluminum arrow inserts?
There is no difference in the process of installing Aluminum arrow inserts. You can install the inserts by following the above steps, and you are done with the installation process.
How to install inserts in carbon arrows?
All types of arrows can be installed similarly, including carbon arrow inserts. Cutting carbon arrows and installing inserts into them are fairly the same. You can therefore follow the process mentioned above without hesitation.
How to install half-out inserts?
Half-outs are different from regular inserts. They are 1/2 placed in the shafts, but the outsert portion comes outside. It means they are half in and half out.
To install half out, insert:
- Use standards filed board to stand the shafts straight
- Use a deeper shaft than regular ones
- Place the inserts as deep as you can. For example, in a 6mm shaft, place the inserts at least 3 mm into the shaft. Other portions will be included in the outserts. (Know the differences between outserts and inserts)
- Here use the fast setting and standard glue to adjust tightly.
Can you use super glue for arrow inserts?

Yes, you can use super glue for arrow inserts. It’s a very good option for adjusting the regular shafts and inserts perfectly. Because they are quick to bond and toughen immediately, you can essentially attach the points with most hot melt adhesives.
FAQs
Do you glue arrow inserts?
Yes, we do because it is the best option to pair the shafts and the inserts straight.
What kind of glue do you use to put inserts in arrows?
Super glues are the best option for putting inserts in arrows. Make sure the glue is a fast setting, shock resistant, and provides tough bonding.
How do you change arrow inserts?
To change arrow inserts, first, take out all the previous inserts. And remove the sticky portion of glue. Then replace them with new inserts.
Can you use Gorilla Glue on arrow inserts?
Yes, we can. And they work better than epoxy glues because they don’t crack too often.
Can I use hot glue for arrow inserts?
Hot glue can damage the inserts if the melting point of your arrow inserts is low. You can apply epoxy instead of hot glue.
Can I reuse arrow inserts?
Yes, you can reuse it. But while removing the inserts make sure the ends are still smooth. Otherwise, they will not fit into the shafts again.
In a nutshell
Installing arrow inserts at home requires easy steps like cutting, placing, and adjusting the inserts. Use the appropriate tools and glue to get the work done perfectly.

