Every time while setting the nocking points I used to struggle a lot. They were too hard to set at 90 degrees angle. And didn’t even know how to set a nocking point with a bow square.
I’ve researched a lot and found out that the bow should be horizontal while pointing. And the points should be at ½ inches above the bow square. You can even do it without using any bow square.
But there are a lot of facts about setting up the nocking points. Like how to set the nocking point without a bow square and much more queries. Let’s dig in to know more.
Table of Contents
- How To Set Nocking Point With Bow Square?
- How To Set A Nocking Point Without A Bow Square?
- How To Set Nock Point On A Compound Bow?
- How To Set Up Nocking Point Recurve?
- Wrap Up
How To Set Nocking Point With Bow Square?
The steps are easy but you have to go through a systematic way. Let’s see how to use bow square while setting up the nocking points –
Step1
Pick some arrows, a bow square, a lighter, a knife, and some super glue. Now let’s get started by putting a bow square on as it clicks. And you have to look until it slides exactly to your arrow rest.
Step2
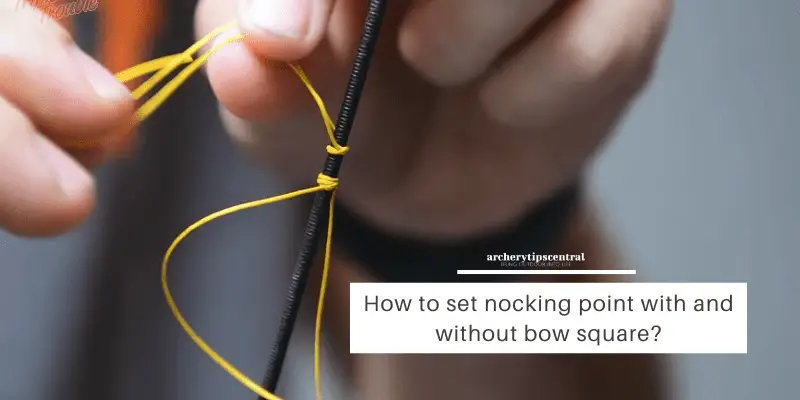
Start the next step with a nocking point on the eight-millimeter diameter of the bow square. Now take two small pieces of thread and we’re gonna start with the bottom nocking point.
Step3
Next, take off the bow square and make a few small knots with the thread. Now put an arrow and press it against the knock. Take another thread and do the same and cut all the excess pieces off.
Step4
Now turn the bow around and place it on the ground horizontally. Then take the lighter and burn the excess threads to get a smooth finish.
Step5
This time you’re gonna set up the bow and shoot at 30 meters to see if we are at the riding position. Now check the target if the bear chefs are lower than the crew. If so then you have to put the nocking point a bit lower.
Step6
You have to redo the process by putting them on Six and to make sure you’re not gonna cut in your serving use the flat to get straight cutting. Cut the threads off and remove them completely.
Step7
Put the 2 bow squares again and you’ll repeat the process. But the main difference here is you’ll tie 15 knots with the nocking point instead of 3-4.
Step8
To make sure you’ve done the perfect knots tie them on a different side of the string.
To get a permanent nocking point, put some super glue and let it dry for about 15 minutes. Because it’s flammable material so when you want to burn it off your whole string will be on fire.
Now you’re all done setting up the nocking points perfectly. So go on shooting.
How To Set A Nocking Point Without A Bow Square?
You know what, you can set a nocking point without a bow square. Let’s see how-
Step1
First, collect a target face with a piece of electrical tape running straight across it. Now set up the bow and get the arrow to rest on the sights of the stabilizer.
Step2
Now take the arrow and put it on the bow kind of at the height of the rest as the same height of your eyeball. Make sure it’s pretty horizontal from your nocking point.
Step3
Through your rest look down the center of your string and the center of the riser line. At the same time put the string right down the center of the arrow. Useusee strings are in the middle of the riser.
Step4
Now put on the target and place it 10 yards away. Walk back 10 yards and shoot on the black line. Move your sight until you are dead in the middle of that black line.
Step5
Once you are confirmed that the sights are perfect on 10 yards go back to 20 yards and do the same pen shot. By doing this you’ll be confirmed if your nocking point is at the right height.
Step6
Now if the aim is pointed below the line then it means your nocking point is too high. That’s why your arrow hits a little bit low.
In such a case all you need to do is take your nocking loop and place it in one direction. Don’t put it on different sides or in a rotation.
Step7
Now keep the strings a bit downward and shoot again. This time the target is gonna hit the black line for sure. But in case you’ve hit over the black line, it means the nocking points are comparatively pointed low.
Step8
So you have to follow the alternative process. Like placing the nocking loop in a different rotation and mode in one direction. It will bring the nocks upward. And the nocking points will be seated perfectly this time.
How To Set Nock Point On A Compound Bow?
Setting up the nock point is almost similar to compound bows. But the little differences are found to tie the nuts. Let’s check out the process.
Step1
Gather some serving thread for tying knots and loops. Keep some D-loop pliers with you as they are very useful for stretching the loop. And also a lighter to burn this.
Step2
Put your arrows right at 90 degrees on the string and lightly secure them in a bow press just so that you can easily tie them on.
Step3
Now we’re gonna use a simple technique called over and under knots. So take about ¼ the piece of the thread and loop it through two times. And then tie the next knot right against the first one.
Step4
Do these 8-10 times then put it right up against the top edge of that arrow? Now burn the excess off. Now push them against the nocking point. But it will be a simple pinch, barely about a half millimeter to 1 millimeter.
Step5
Do it at both the top and bottom several times and make sure they are strongly tightened up. Now finish the process by properly tying the D loops. And you’re done!
How To Set Up Nocking Point Recurve?
Setting up the Recurve nocking point is quite easy. Just go through these steps-
Step1
Use brass nocking point, nock pliers, and t-square for recurve bow. Take your recurve and your t-square. And you just clip that to the strings.
Step2
Put the arrow at 90° angles and then put the brass nocks right there. It will be at exactly 8″ or the middle of the arrow rest.
Step3
Now take the t-square and place it on the strings and start tying knots. You can adjust them with pliers if the brace height is not maintained.
Step4
Tie the knot with the same over-and-under technique as the compound bow. Burn the excess and your recurve bow is set up with nocking points.
Wrap Up
Setting up the nocking points is an easy breeze. You just keep the arrow sharp at 90° and do the tying and looping according to each bow.
No matter whether you are using any tool or doing free hand, all the procedures I’ve mentioned are gonna give you a trouble-free nocking point setup!
